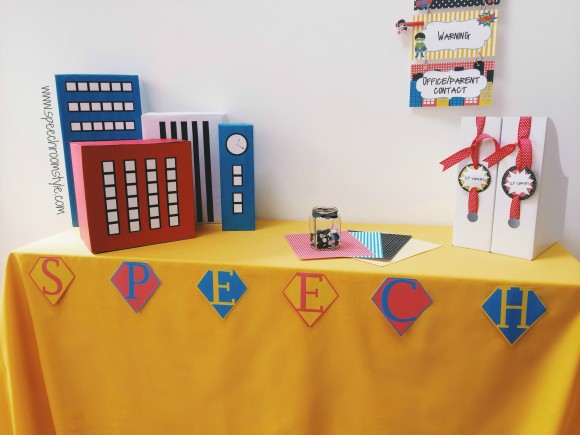
This year we’ve really enjoyed coming up with superhero classroom ideas and designing our Superhero Decor Pack. Along the way we have picked up little ideas that complement this fun pack wonderfully – one of these is a ‘cityscape’, which we will show you how to create today. Every Superhero needs a city to protect and uphold, and this one does it in color!
Here’s our list of what you will need to create these heroic structures:
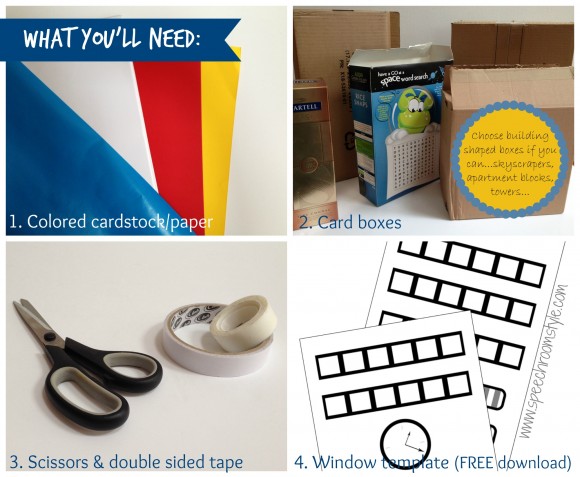 A pencil and measuring ruler would be useful too!
Here’s how we made our ‘cityscape’:
- Tape your boxes securely shut – while keeping a good cuboid shape and straight edges.
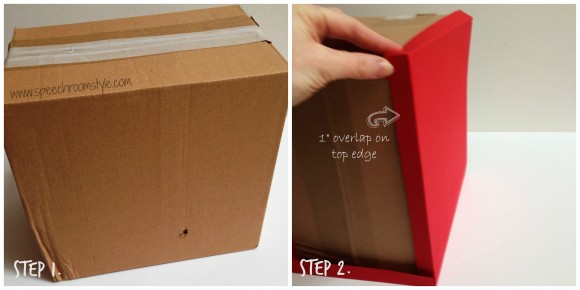
- I chose red card for this building – card gives a stiffer edge to your buildings but is a little trickier to put on than lighter weight paper. Firstly, cover the sides of your building by laying the box on its side and measuring the length and width you will need to cut out. Allow an overlap of approx 1″ on the top edge of your box – just to cover up any possible gaps between roof and walls and give a continuous finish. Make folds in your card at each of the boxes edges – this will give a cleaner edge to the finished building.
- Place double sided tape along the edges of the box as shown.
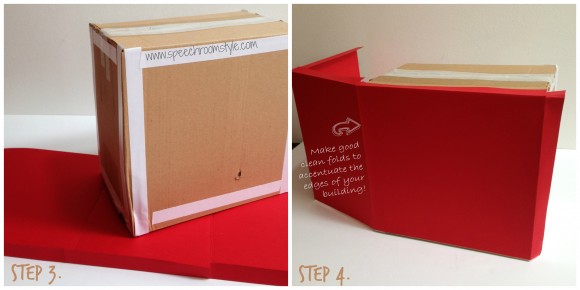
- Stick your card onto the box – one side at a time, keeping corner edges neat and straight.
- Next, add the roof. Using your ruler…
 The overlap from the top of the walls should be tucked under the rooftop to give a gap-free finish to your building.
 - Now your building is ready for windows! Print out your windows Cityscape Window Template & decide whether you want vertical or horizontal windows on your facade.
- In this example, the windows are running vertically, so the first step I need to take is to find the center-line of my facade by measuring the side and halving that dimension to get a half-way point. Then mark on a vertical center-line in pencil.

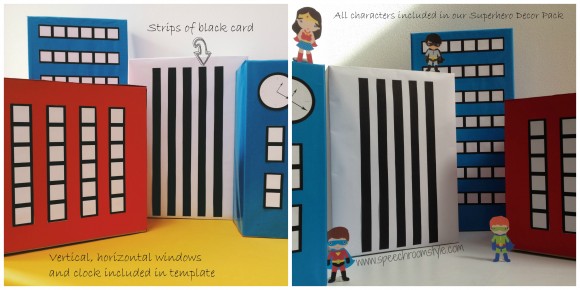
- Lay your window strips on the building and decide on the spacing you’d like between them – I’ve left about an inch between mine. Then using the center-line as a guide, stick on your window strips using double sided tape, keeping a consistent spacing between your windows.
- Your card covered apartment block is now finished! To make the buildings using lightweight card, just ‘gift wrap’ the box using double sided tape (just like a gift!) and paper, paying a little extra care to give neat folds and joins. Print and stick windows as before.
 If you’re liking the Superhero theme, and would like more Superhero Decor for your room , why not drop into our TeachersPayTeachers store and buy yourself a copy of our editable Superhero Decor Pack, which includes over 105 printable pages of Decor for your Speech Room.


Leave a Comment