
I always intend to be ultra-organised and have my gifts for students sorted in plenty of time for Christmas – but as usual, I’m running late again this year! So, if like me, you need something that’s quick and easy to put together but still has that ‘personal’ touch, then these snowflake candies might be just what you need!
You can make these in advance and give as gifts to your students or make them in your Speech Room as a “following directions” activity and let your students gift them to a family member or friend.
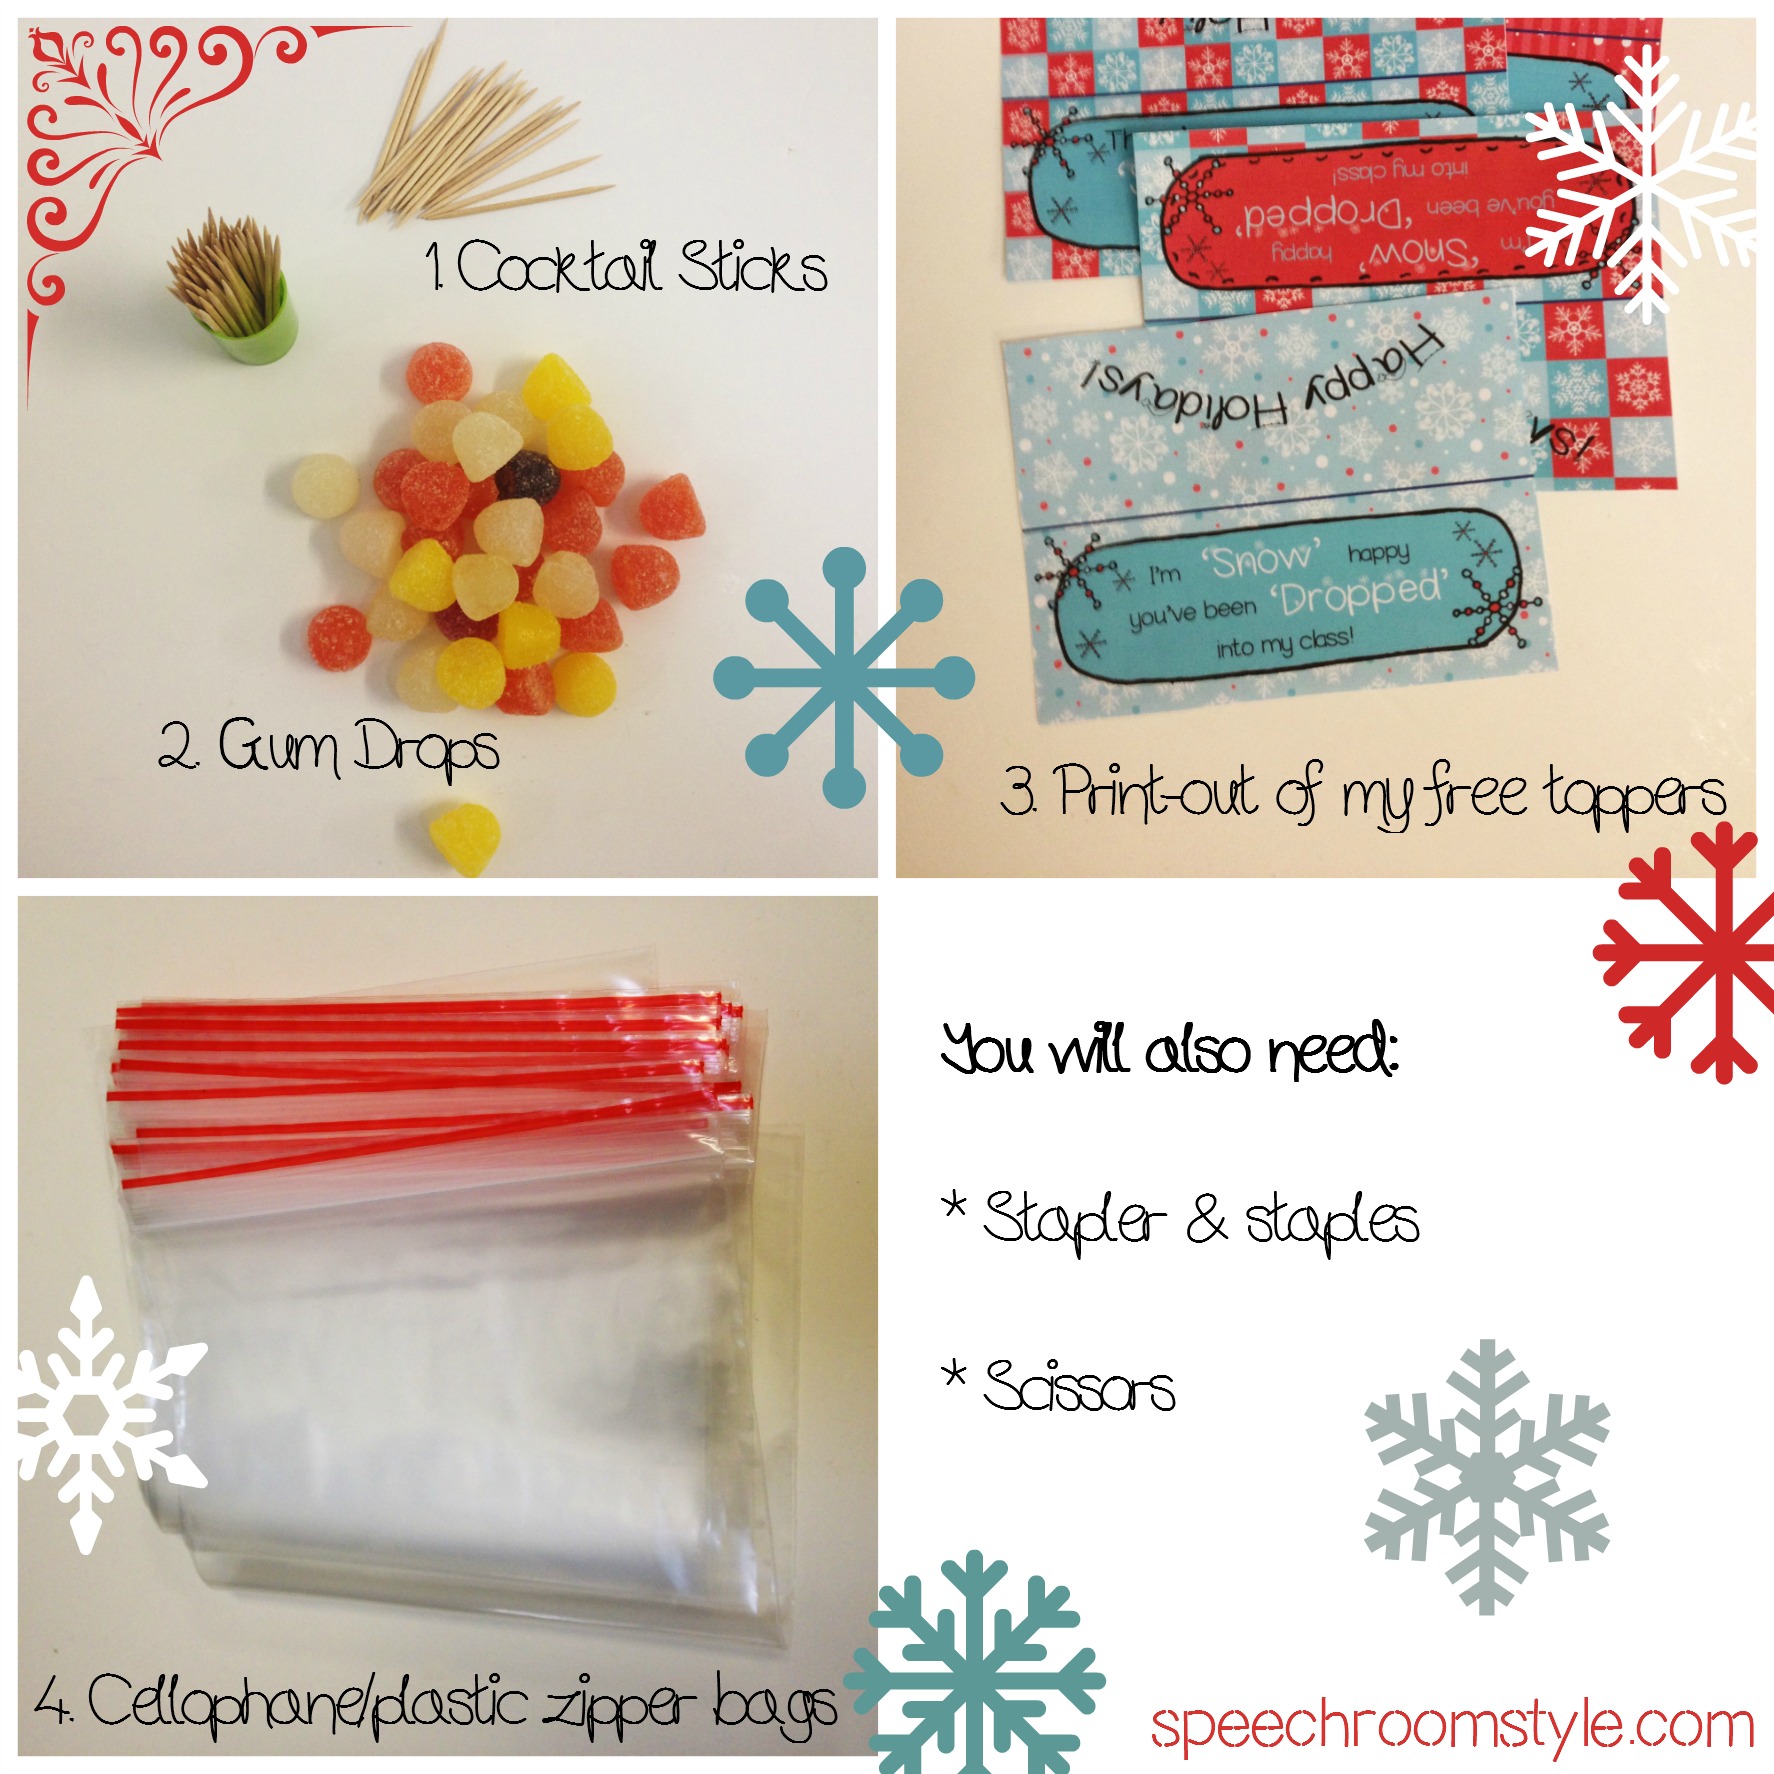
To make these cut little treats, you will only need a few easy-to-get items:
They really are very easy to assemble using just a few simple steps:
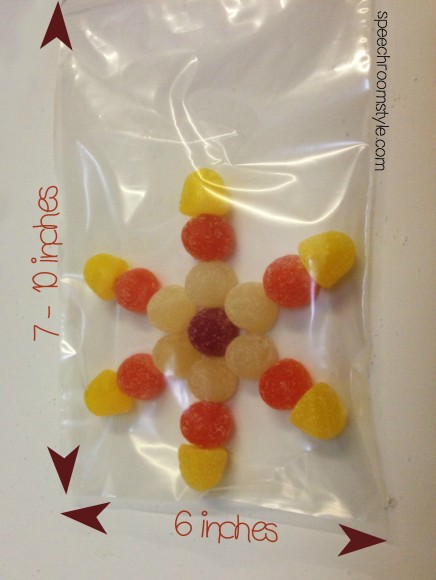
- Each snowflake will use 19 gum drops and 6 cocktail sticks. I chose to use 3 different colors on the spikes of each snowflake and then a single contrasting gum in the center, but I think you could use any colors you like and mix and match throughout. To start, thread 2 gum drops onto the stick with the flat surface of the gum facing down. Then fix the ‘tip’ of the snowflake onto the end of the cocktail stick with the flat part of the gum facing the other gums and the curve facing outwards. Try to leave no space between the gums and remember there should be some of the stick still visible for fixing the spines to the center of the snowflake:
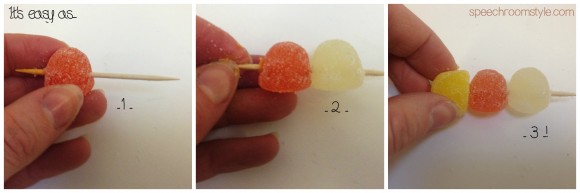
- Repeat step 1 for the other 5 cocktail sticks (placing 3 gum drops on each stick).
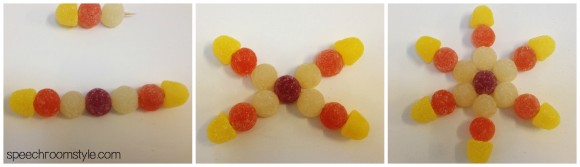
- Now it’s time to assemble the snowflake together! Pierce the remaining center gum with the protruding end of the cocktail stick, then place another ‘spine’ into the opposite side of the center gum drop. Repeat this until all 6 spines are securely attached to the center as shown below:
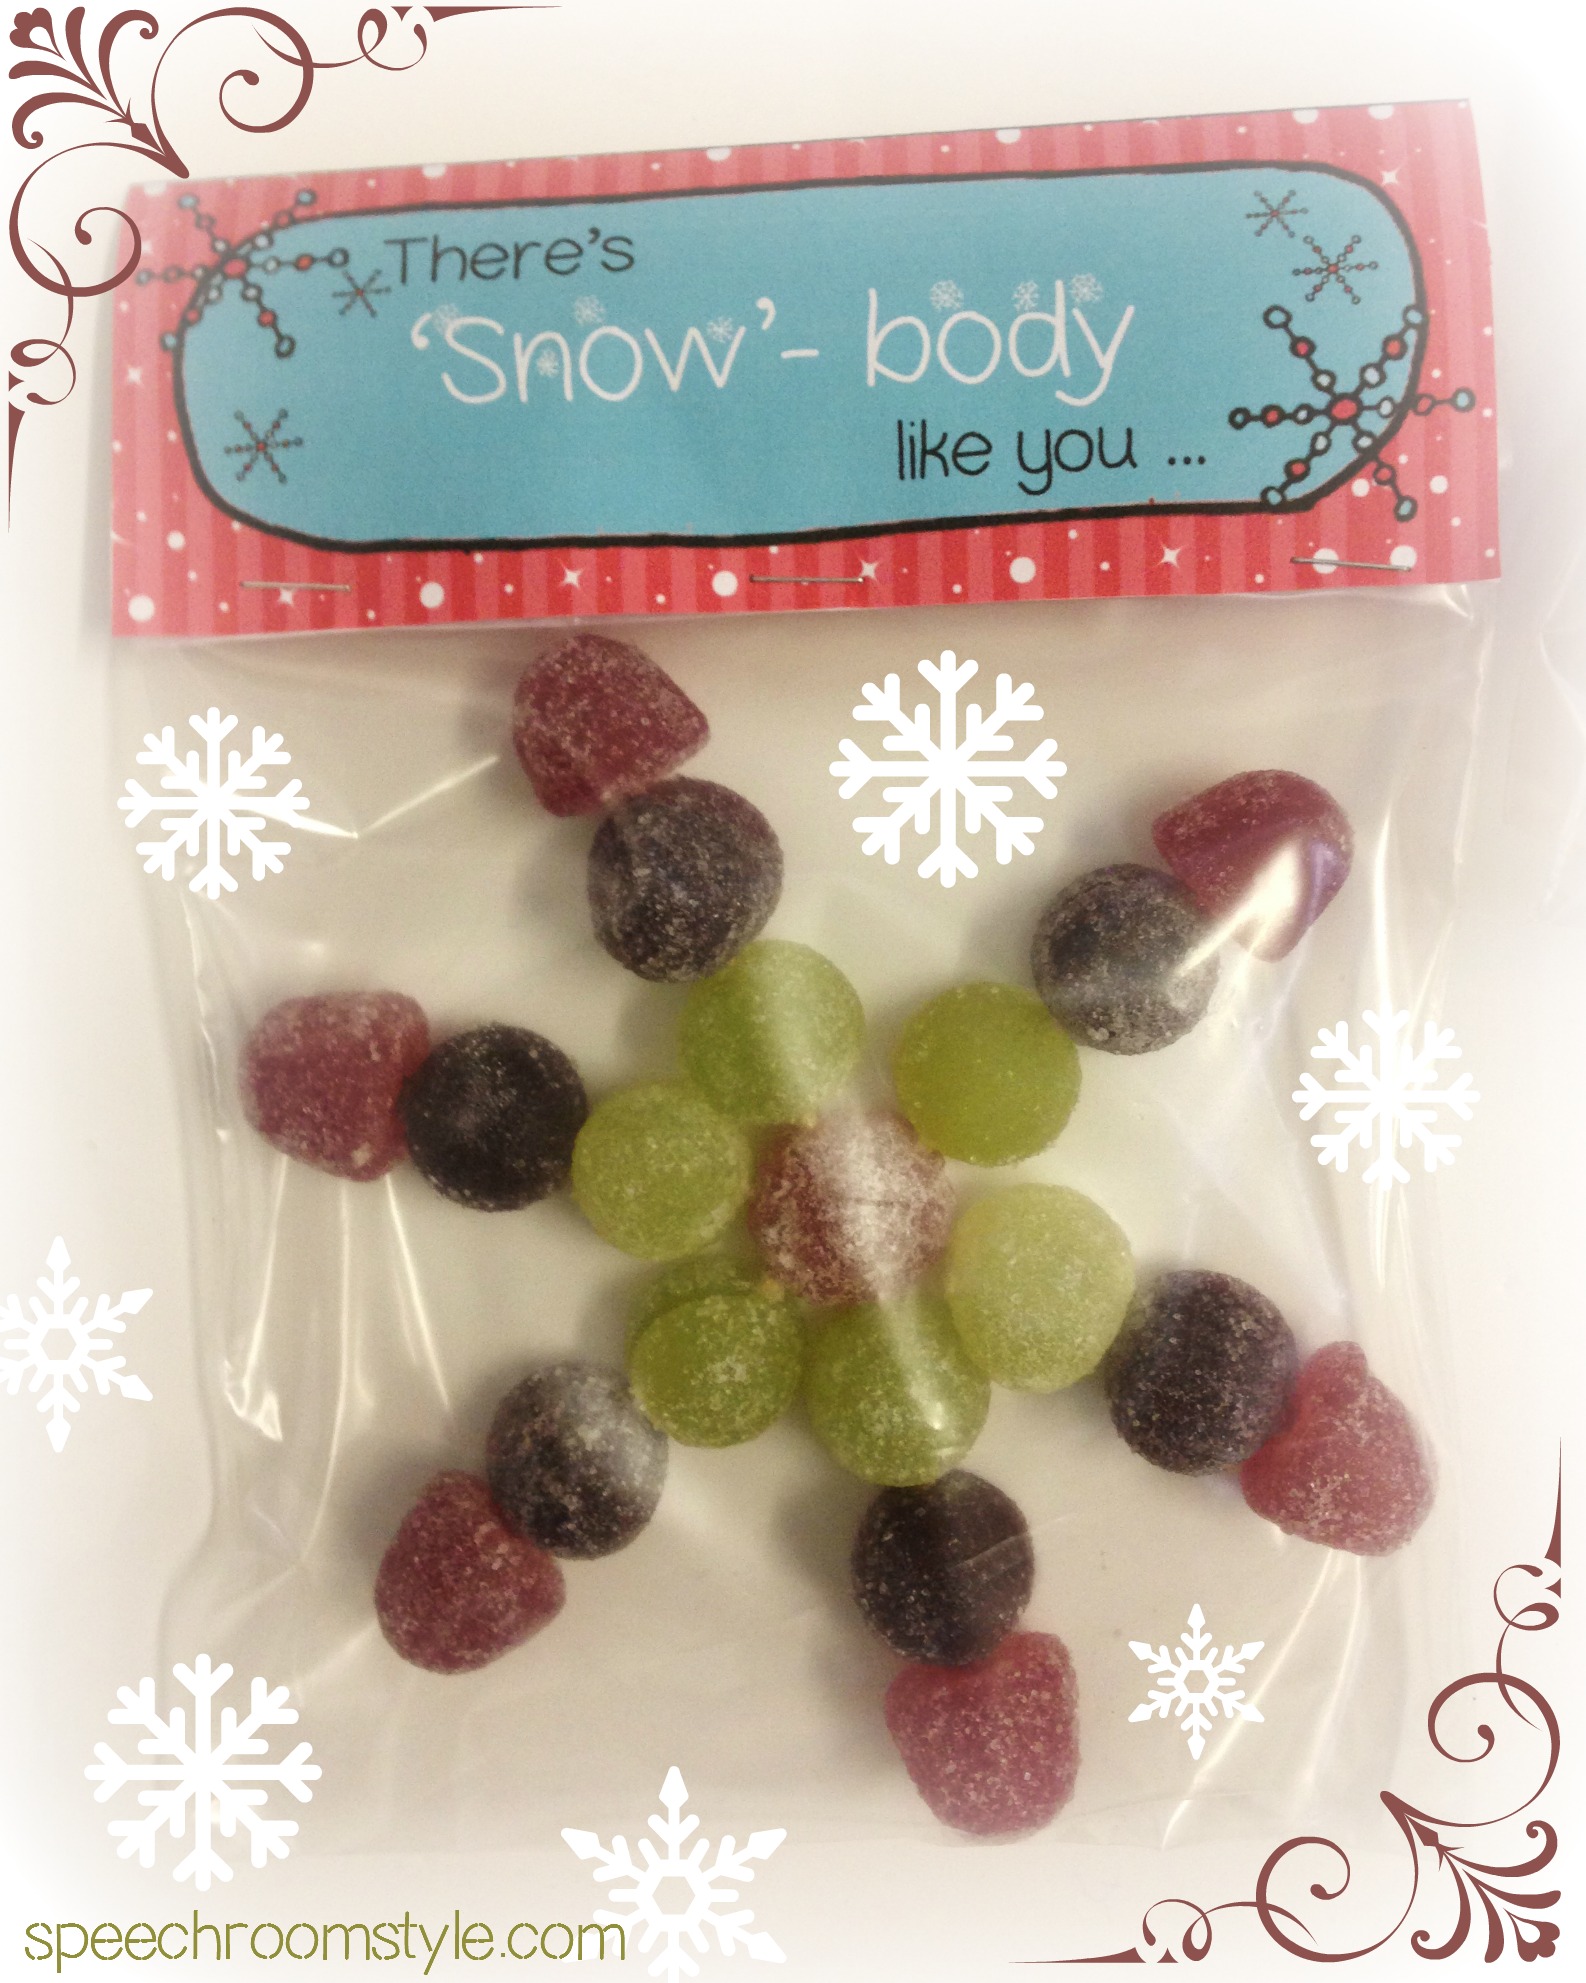
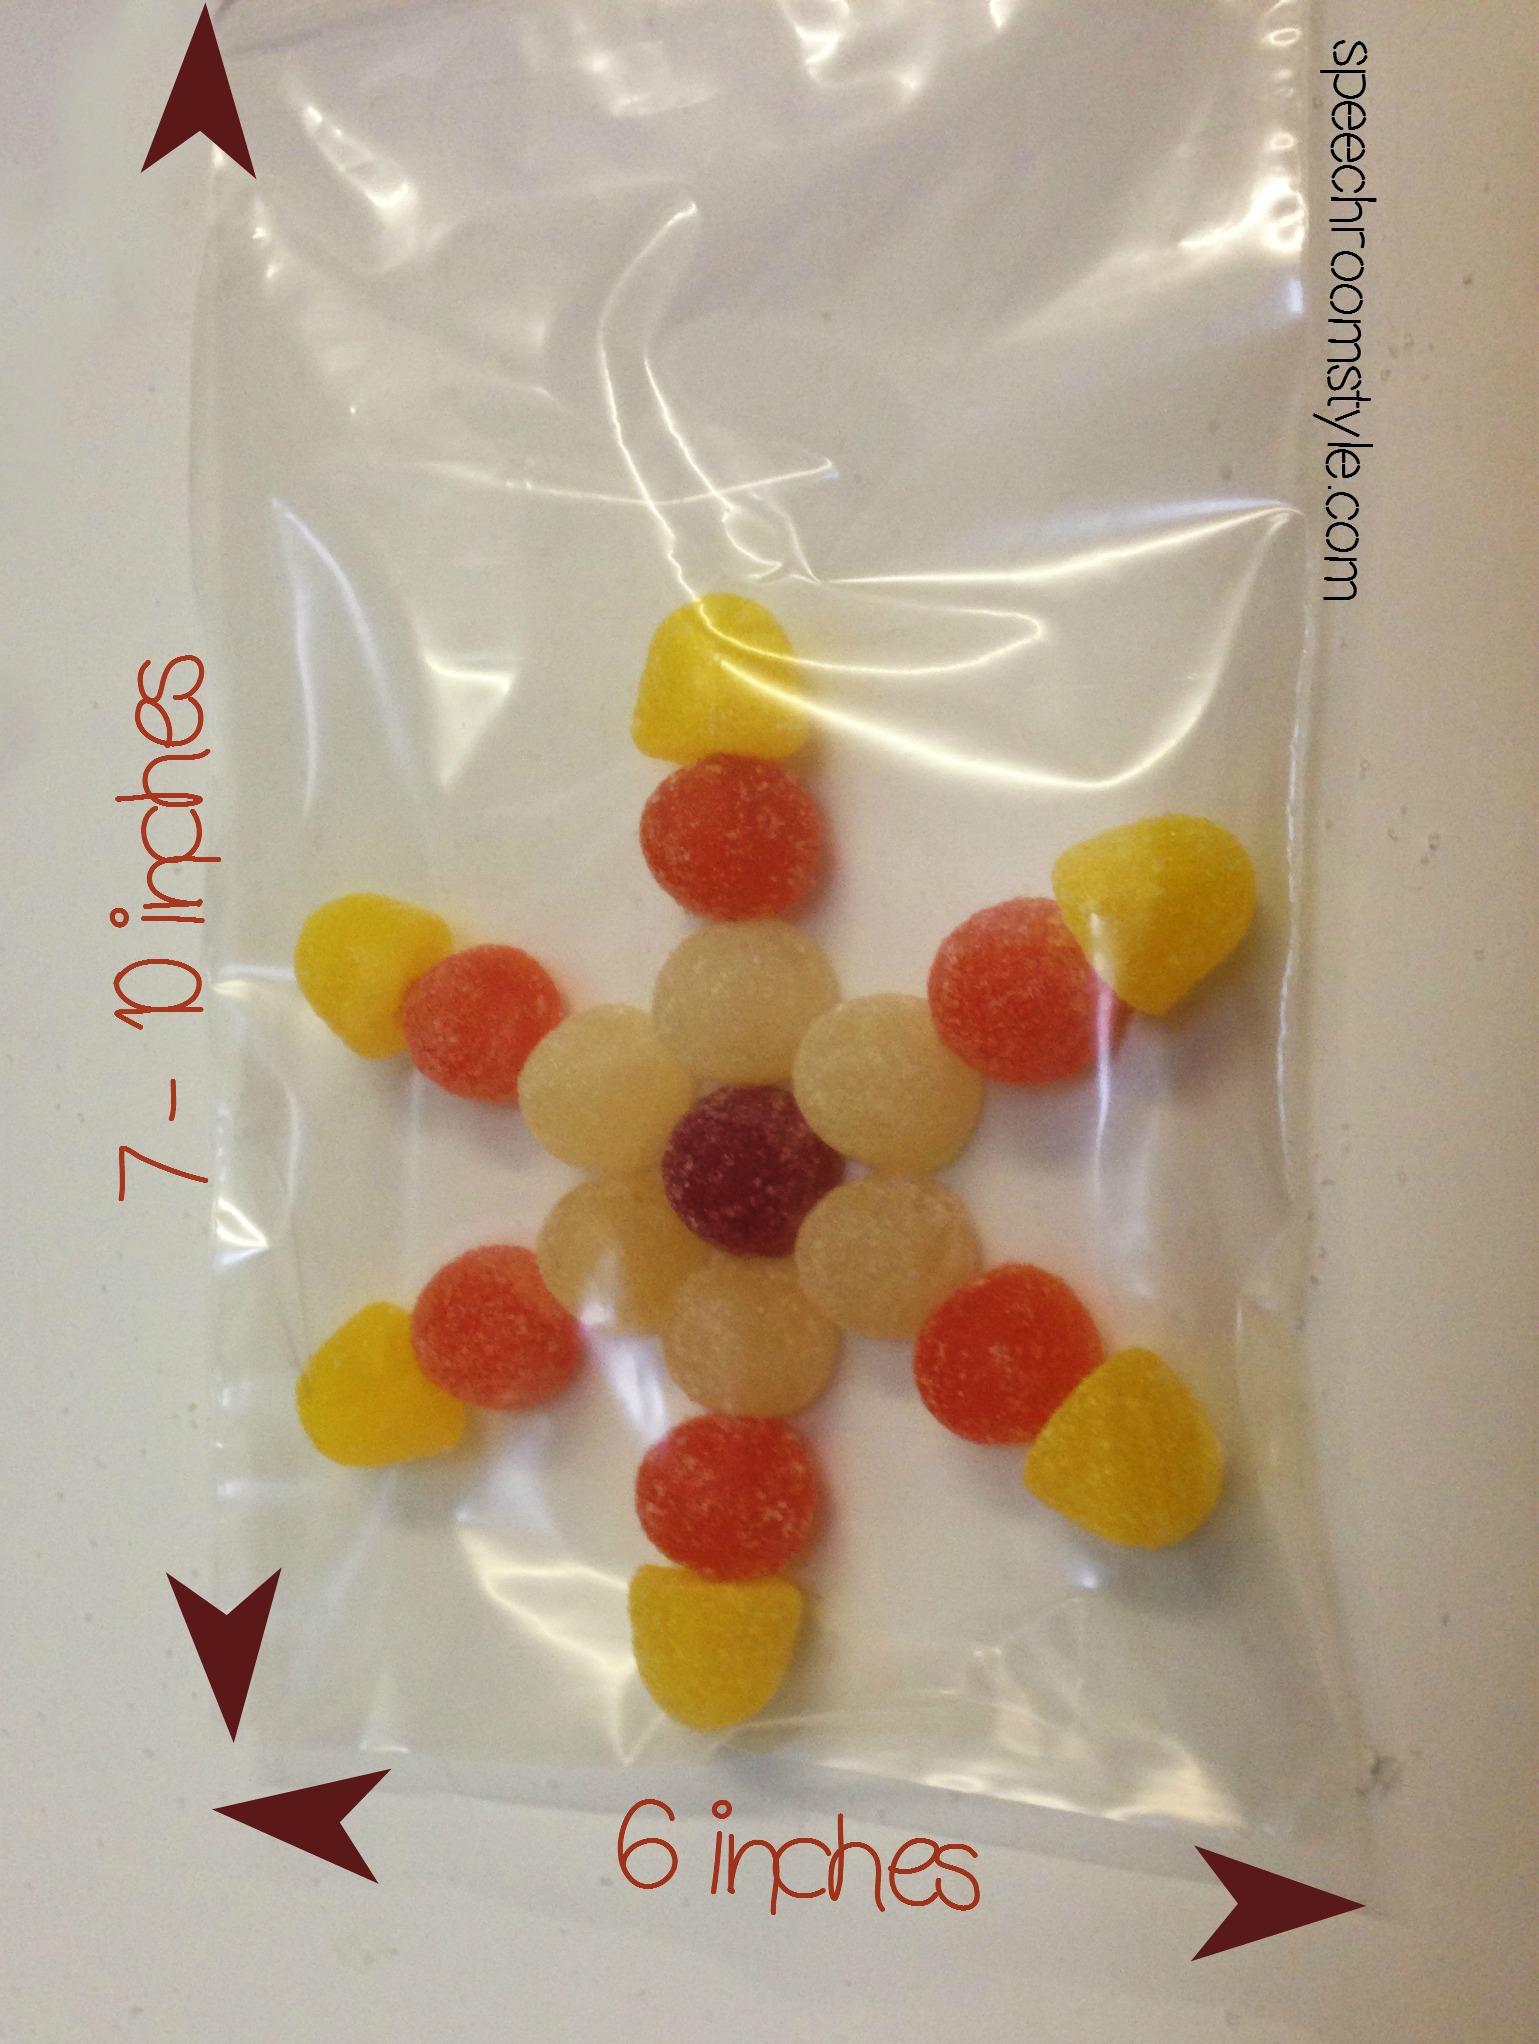
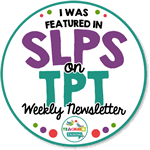
- Place your snowflake into a cellophane/plastic zipper bag. I found that a 6” wide bag worked well for these. The length isn’t so important (min 7”) as any excess can be hidden under the topper.
- Print your free toppers! – Download them here, then choose which ones you’d like to use and print them out. I have saved the toppers at 6” wide – if you need to alter the size, then this can be done in Microsoft Publisher by right clicking on the image and choosing ‘Size and Position’ and changing the size in there.

- Cut out the toppers and staple onto the top of your bagged snowflake.
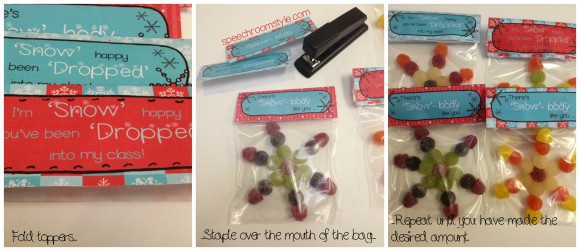


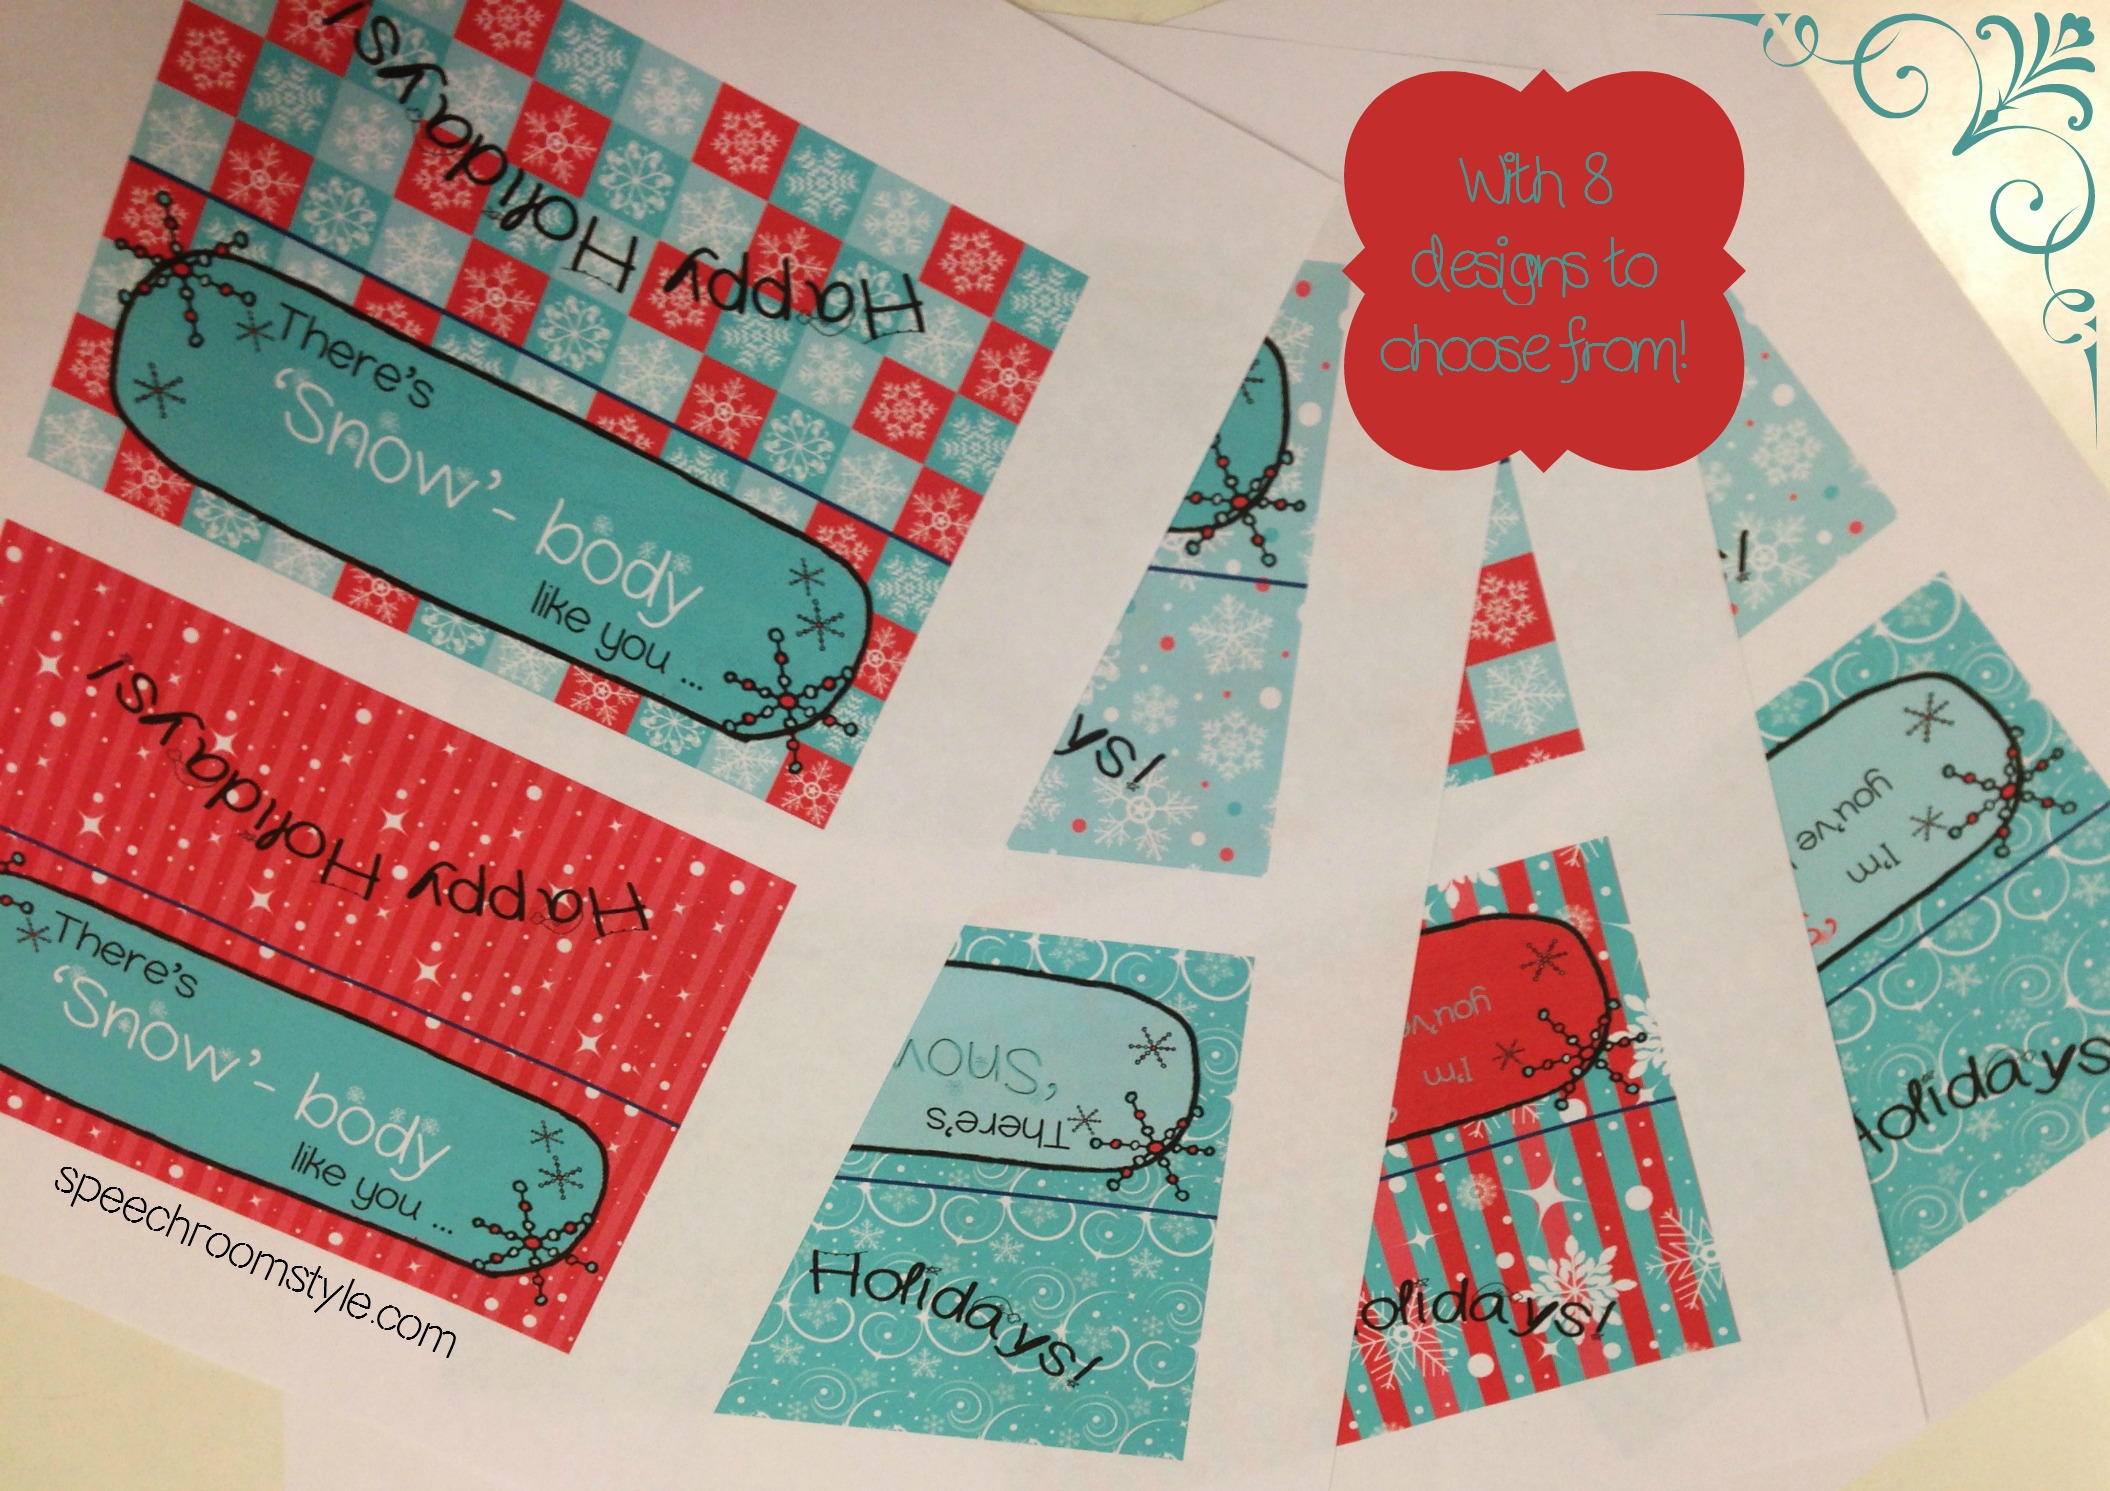
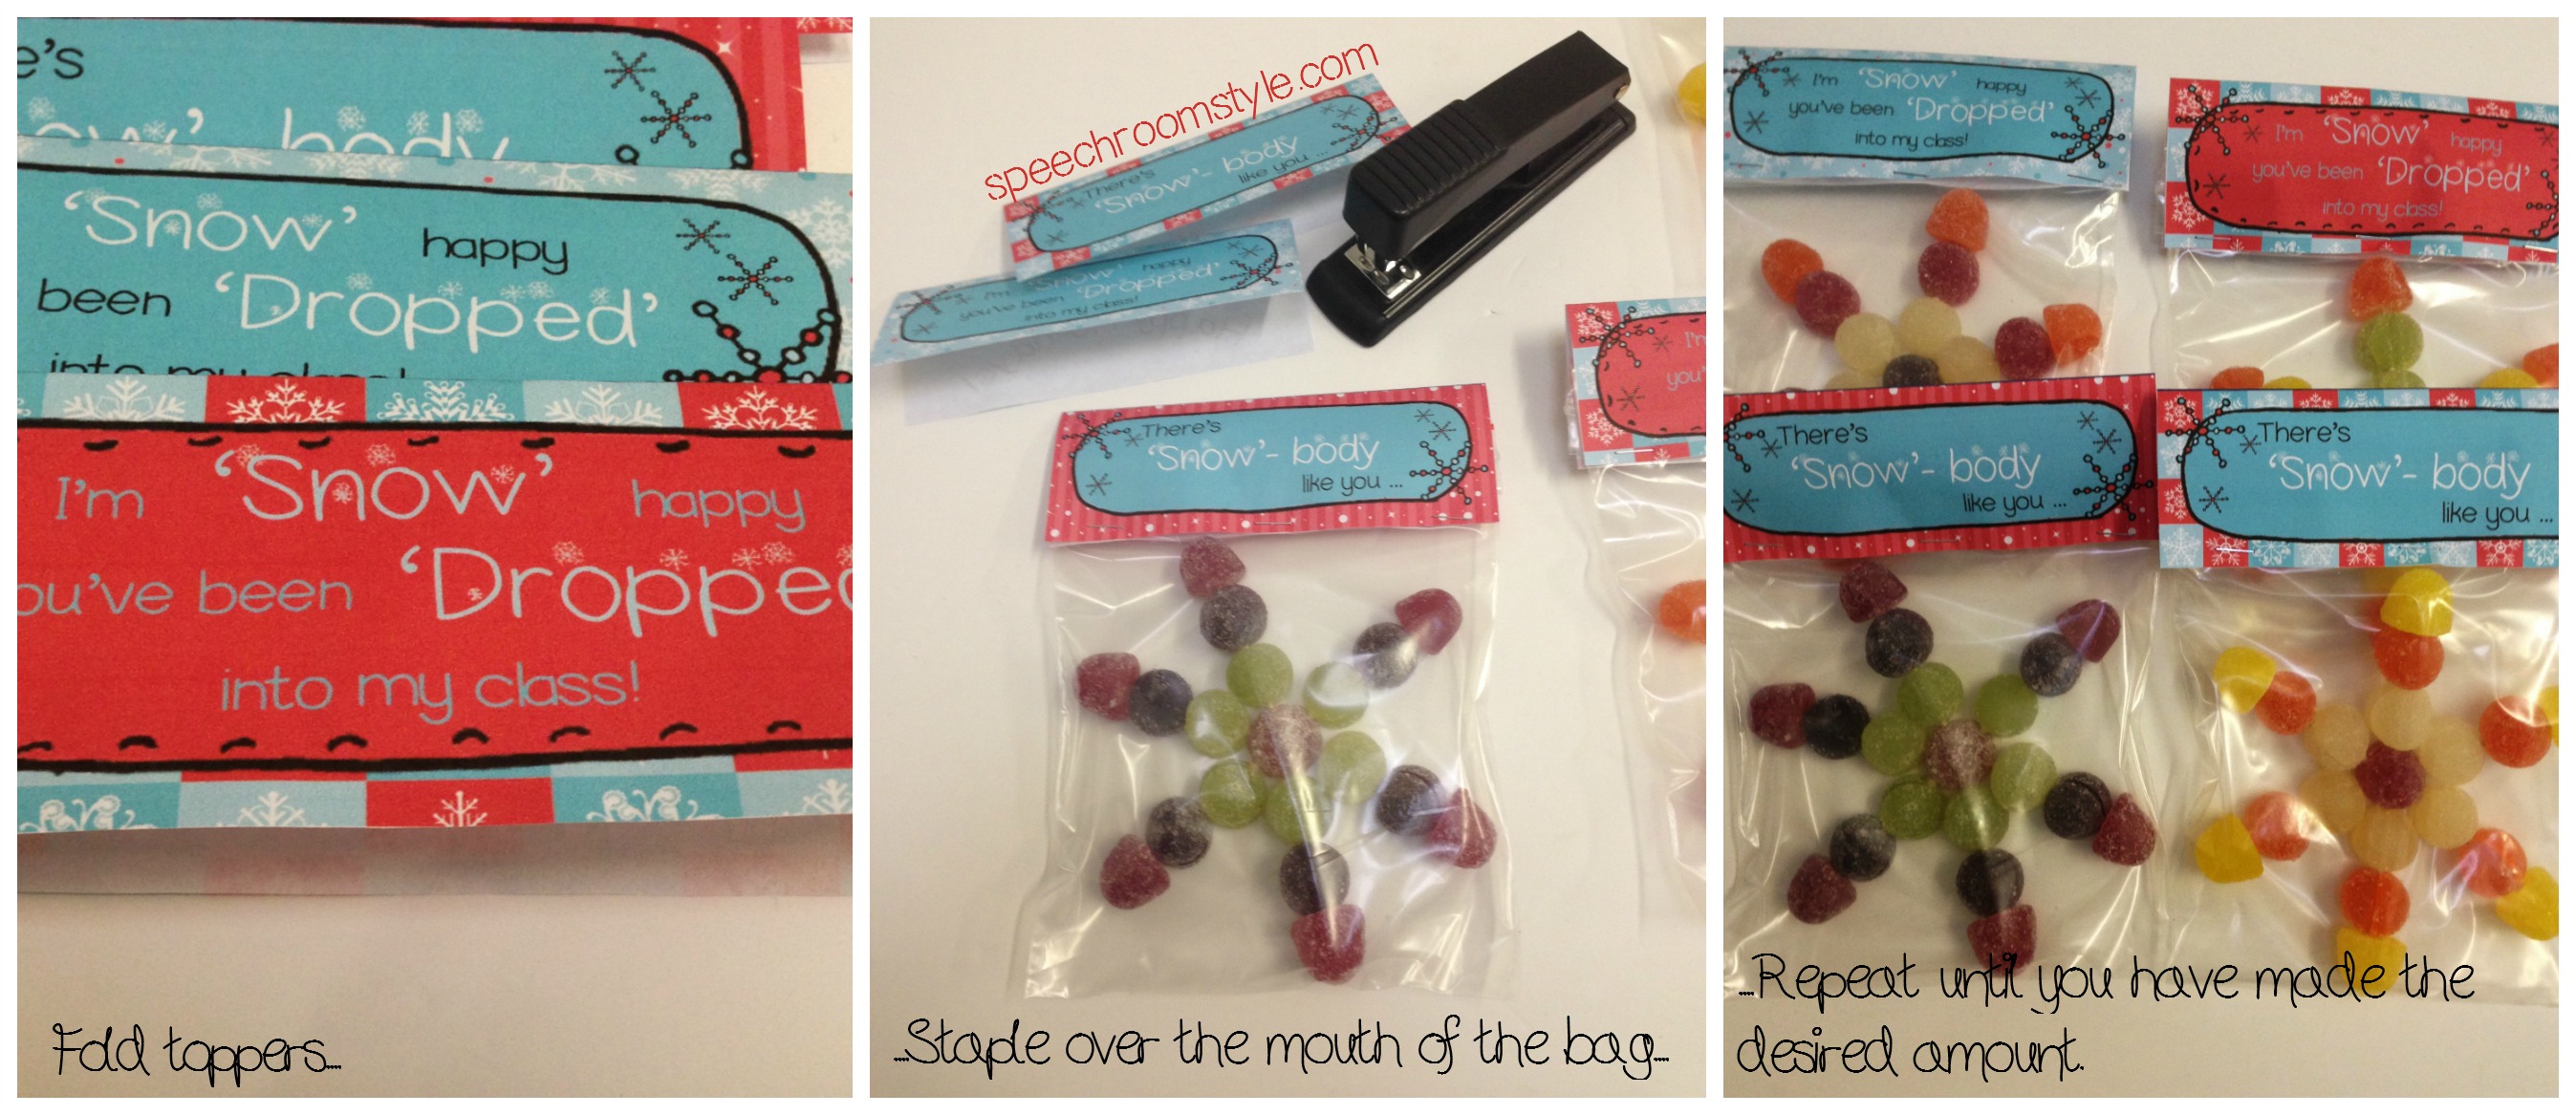
It really is that easy! I have included 2 different slogans on the bag toppers:
- I’m ‘Snow’ happy you’ve been ‘dropped’ into my class (you could use this one to gift to your students)
- There’s ‘Snow-body’ like you! (this one could be used by students to gift to someone special!)
The reverse of the toppers reads ‘Happy Holidays’. Hope you find this craft useful to you and that it will bring joy to those you give it to!
If you are looking for more Christmas crafts ideas why not check out some of my other posts:
- For a gift for colleagues or friends, check out my Dotty Chocolate Cookie Mix Jar
- For more activities to do with students have a look at my Robin Handprints Activity
- To make something for the tree, check out my Button Ornaments
Happy Holidays!

Leave a Comment