During the course of designing our latest Decor Pack – Red & Blue Owls (available now to buy at our TeachersPayTeachers Store), we found this fab craft project that we just have to share with you. We needed some flowers in tones to match our red and blue color scheme to add interest to our classroom decor and using this easy technique, we were able to make our own flowers in various colors – and quickly too!!
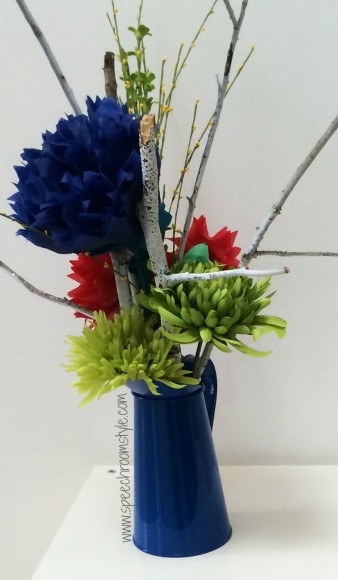 They are so easy that you can make them with students too – great for using as decorations anywhere in your class room or speech room. Here’s the list of what you will need to make yourself some of these great decorations:
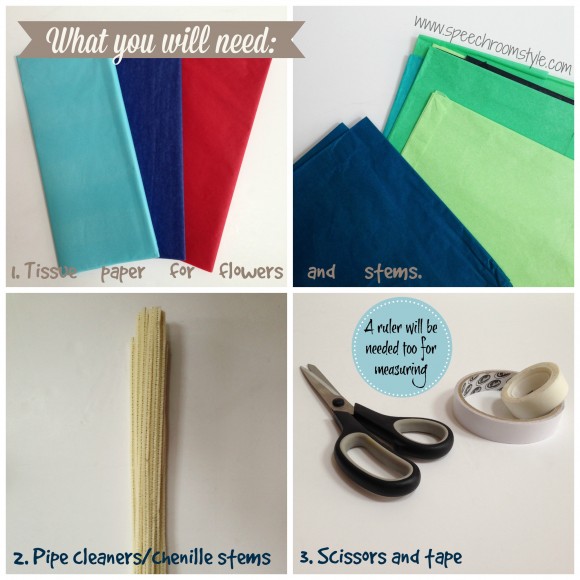 Then follow these easy steps to complete your flowers:
- Using the main color of tissue paper you’ve chosen for your flower, cut 8 squares measuring 10″ each for a large flower or 7″ each for a smaller flower. Lay the 8 layers on top of each other.
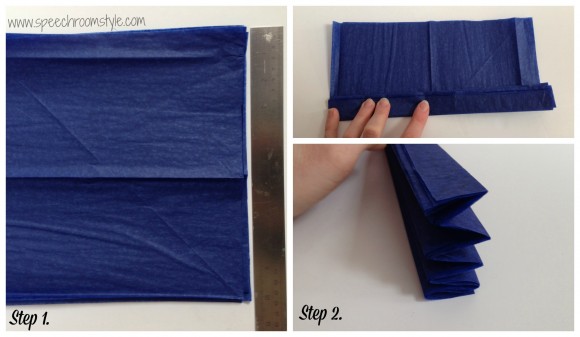
- Now you need to fold your layers of tissue paper. Fold the top 1″ down on top of the rest, then fold this back over on itself in a concertina style until you have the length of the tissue paper used as shown.
- Wrap a pipe cleaner/chenille stem around the center of your folded tissue paper – making it quite tight and secure to hold it all in place.
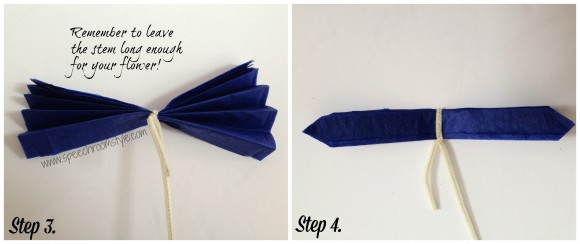
- Using scissors, trim the edges of the tissue paper into points as shown – an adult should do this part as it does require some effort to cut through all the layers together! The points add a nice effect to your finished flower – like a dahlia flower.
- Now its time to bring your flower into bloom! Open out one side of your folded tissue and peel away the top layer – do this carefully to avoid tearing the tissue paper.
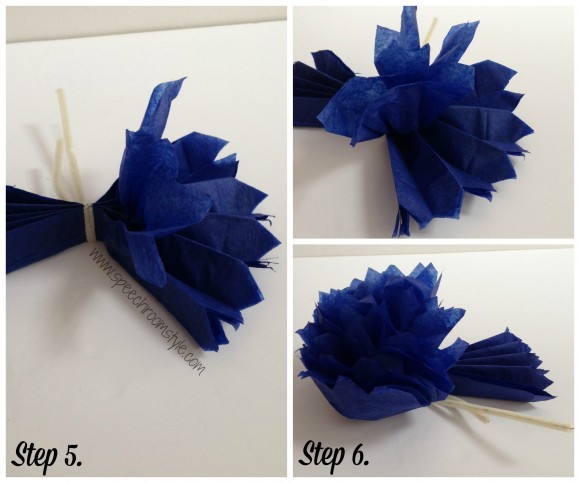
- Continue peeling open consecutive layers of the tissue paper as shown above until you have all the layers unfolded and your flower is taking shape nicely.
- Repeat steps 5 & 6 with the other side of the tissue paper. Now you should have a nice full bloom!

- Using green tissue paper, cut a leaf shaped strip out and wrap it around the chenille stem of the flower. This should create a nice green stem for your flower.
The blue flower is in the larger 10″ size. We also made a few red ones in the smaller 7″ size like this: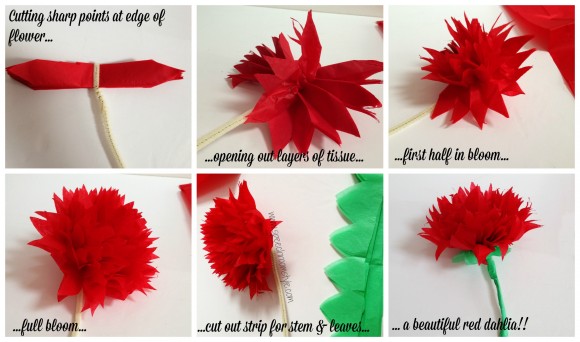
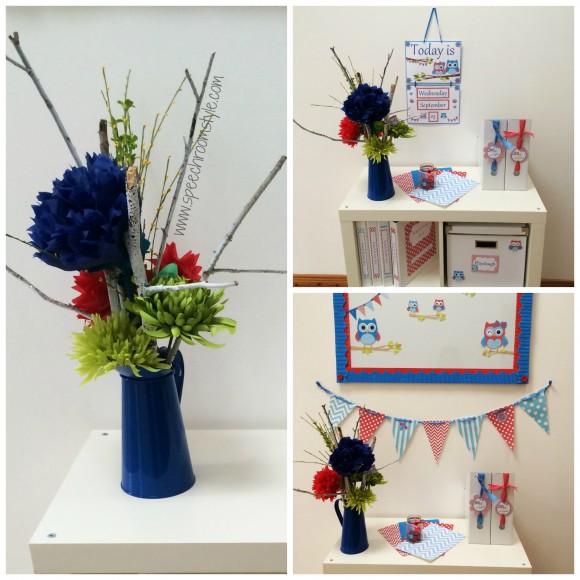
To make up the flower arrangement that features in our photos for the Red & Blue Owls Decor Pack, I used a blue jug to set them in and some branches coated with white spray paint to fill it out – we were really happy with how they added some more color and style to our photos! Click to read more about my Red and Blue Owl Speech Room Decor pack.
 If you like what you see in our Red & Blue Owls Decor pack, then why not pop over to our TeachersPayTeachers store and get your copy today. With over 120 printable pages of decor, it’s sure to add color and cute factor to your classroom decor!

Leave a Comment