When producing our new decor packs, we were searching for new classroom bulletin board ideas – we read a lot about fabric covered bulletin boards – how they give great vibrant colors to your board, don’t fade as easily in the sunlight as paper covered boards and of course fabric is more robust than paper, so they should last a little longer too! After such positive comments, we decided to have a go at making one of our own during the course of designing our Superhero Decor Pack (on sale now in our TeacherPayTeachers Store) and thought we could share with you how we made ours!
So here’s the list of what we used: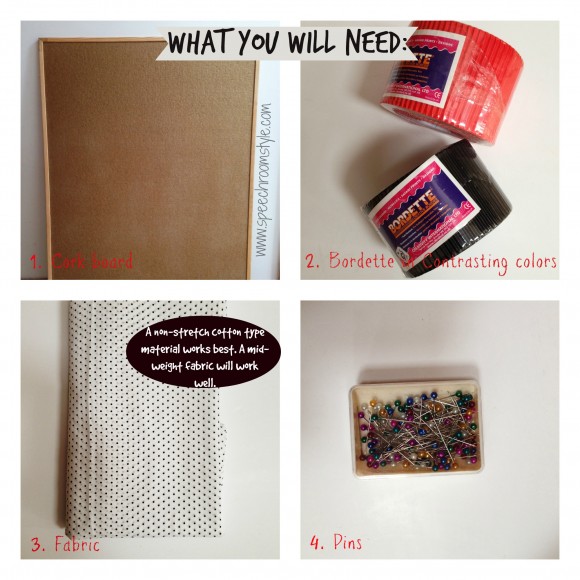 This is how we made our one:
- Iron out your fabric – we don’t want any creases sneaking into our finished board!
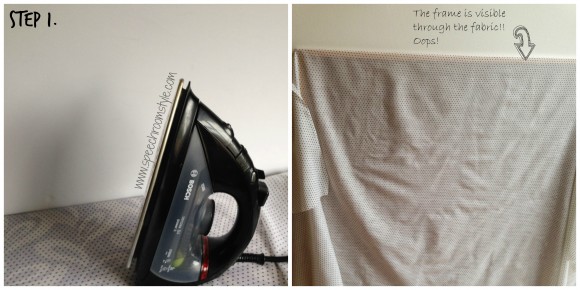 As I was ironing the fabric, I realised that our fabric was really quite translucent! When I checked it on the board, the frame was visible through the fabric. The pattern looked quite dull with the cork behind also – but…luckily I had some white fabric at hand to put under the patterned one – lifesaver!
 - So the next step is to lay your fabric on the floor with your board on top. Fold the edge of the fabric over one side of the board and pin it in place. Be careful that the pins don’t come through to the other side of the board – this could be dangerous for you and students!
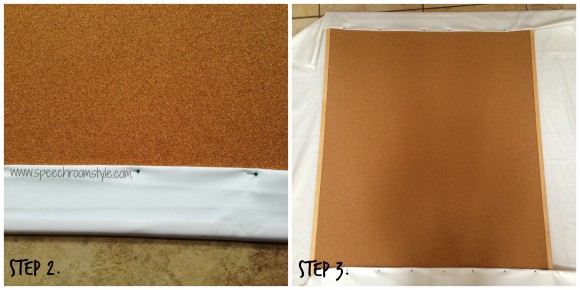
- Next, fold and pin the opposite side, keeping the fabric pulled quite tightly over the board.
- Then repeat steps 2 & 3 with the two remaining sides – at the corners, we have used an envelope fold, just to try to keep it a little neater. Remember to keep your fabric pulled quite tight over the board to avoid any wrinkles on the front of it!
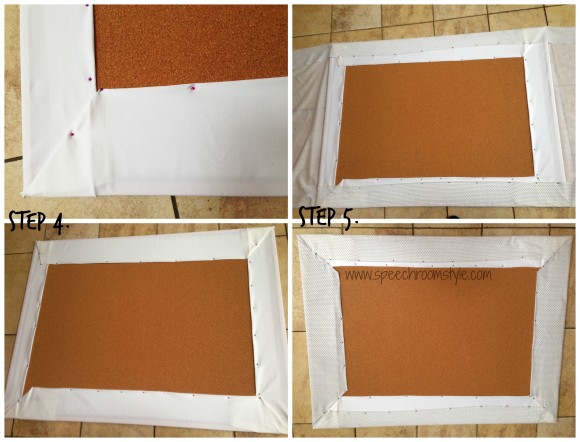
- As the white layer was just our underlay, we now had to repeat steps 2-4 using our dotty fabric…..make sure you get a medium weight fabric!!
- The next step is making the bordette frame for your board. Bordette is a great product – it’s so easy to work with! We have decided to put a red layer with a straight edge on the inside and a black frilled layer on the outer edge. Two frilled edges or two straight edges would work fine too – we just wanted to mix it up a little! Trim your bordette to the correct size for your board, starting with the inner layer (red).
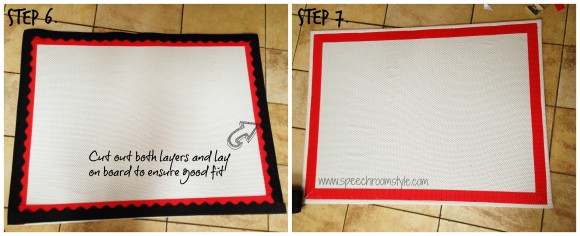
- Then fix the inner layer of bordette in place – we’ve used pins, but if you have access to a stapler, I think that this would make a more robust fix. We have cut the bordette at an angle at the corners to avoid any overlap of the border, but it can be tricky to get the angle just right and on subsequent boards we have just overlapped the border and it has looked great too!
- Now the outer layer of bordette can be fixed in place using pins/staples as before:
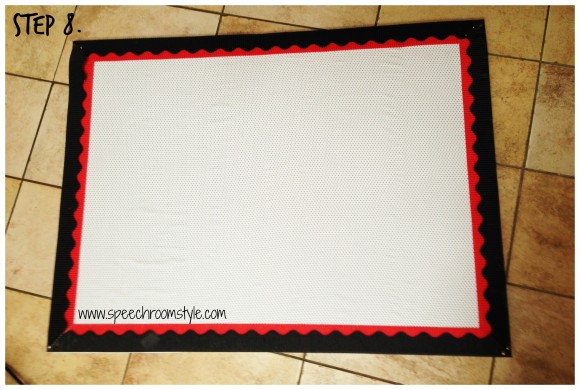 It really is as easy as that! The fabric gives a great background to your bulletin board and you can fix items to it using pins/double sided tape.
We used double sided tape to attach our Superhero Decor bulletin board pack to ours – it’s easy to reposition when using it on fabric – great for any little mishaps!
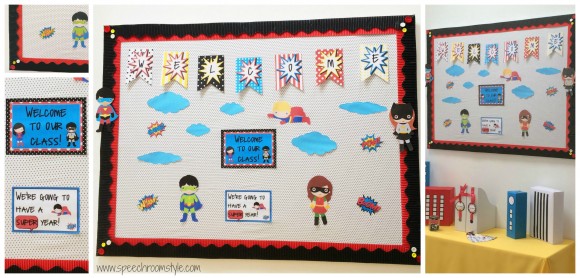 If you would like to see more of our editable Superhero Decor Pack, pop over to our TeachersPayTeachers Store now and have a browse!
★ If you enjoyed this post, you might also like to read my Superhero Classroom Decor post ★


Leave a Comment