
Today’s Christmas Ornament Craft could double up as a Christmas gift! These ornaments can be made from various types of cardstock, old Christmas cards, photos or even students artwork!
 These cute ornaments could be made with students as a gift for parents/grandparents with either photos or special artwork shown on them! Alternatively you could make use of old Christmas cards – I always save my favorite card designs – and this would be a really useful way to preserve them!
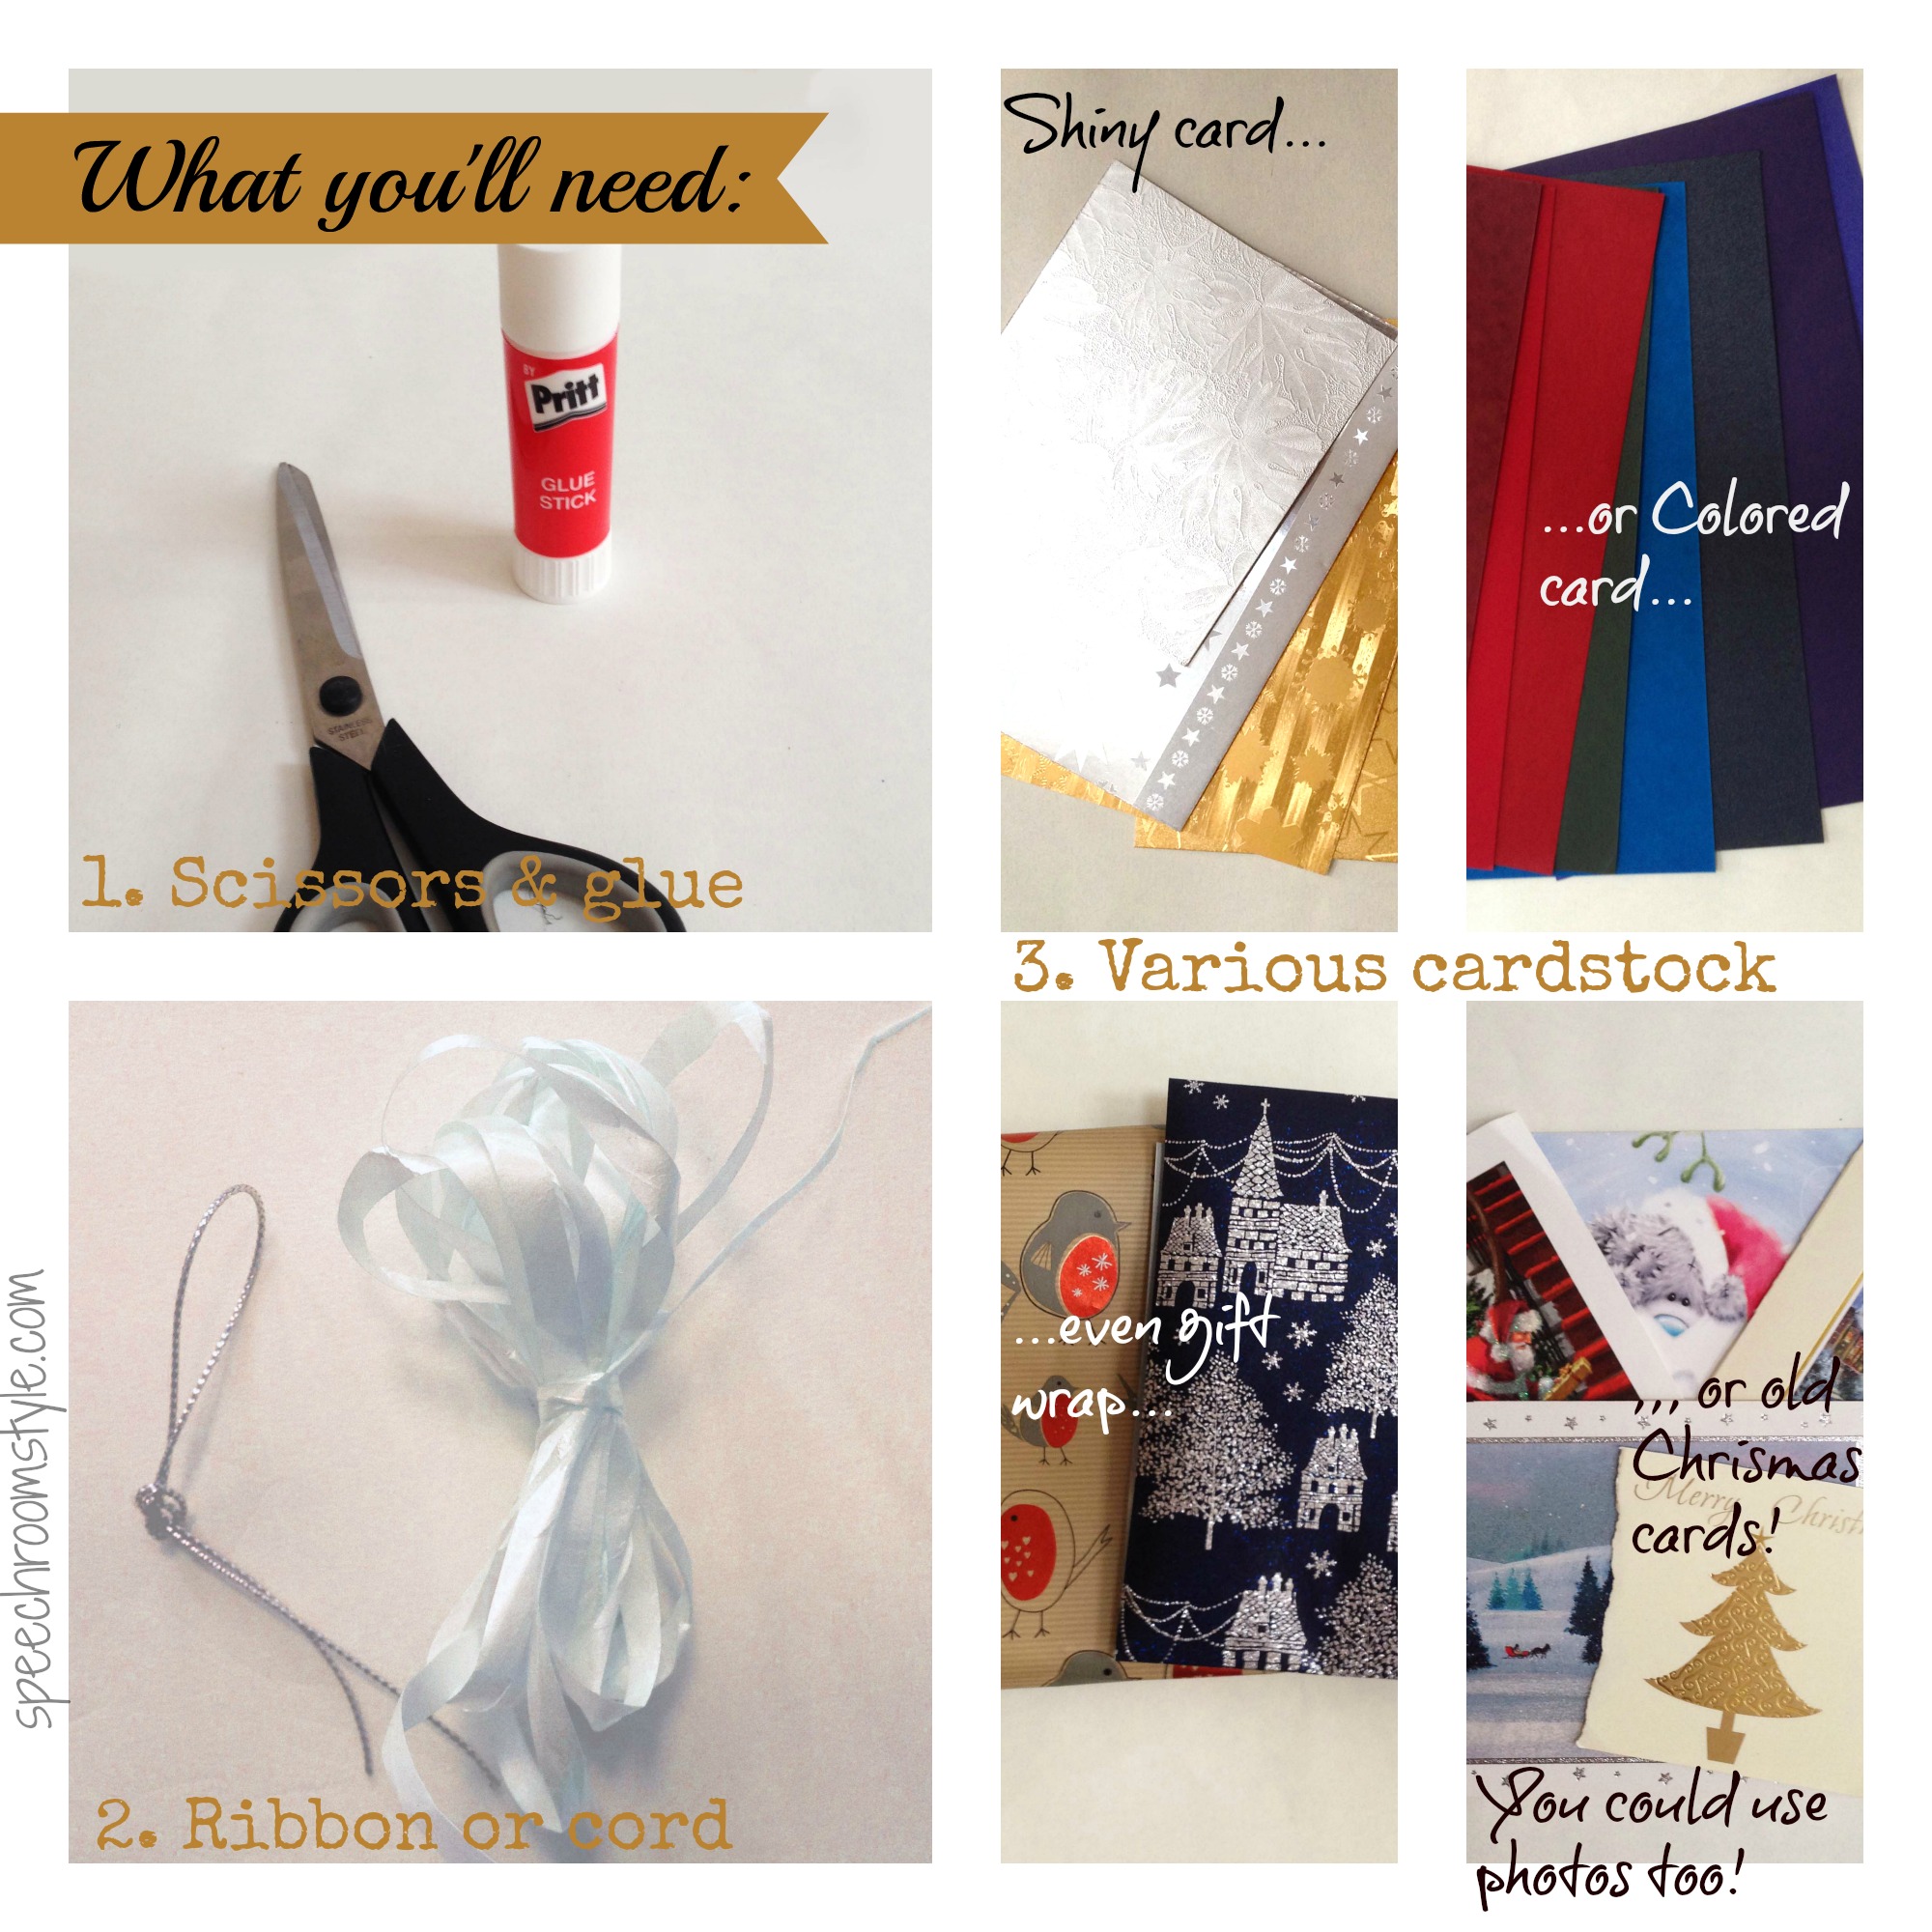
So, lets get started! Here is a list of what you will need:
 Once you have collected all your materials, there are a few easy steps to follow to complete your tree ornament:
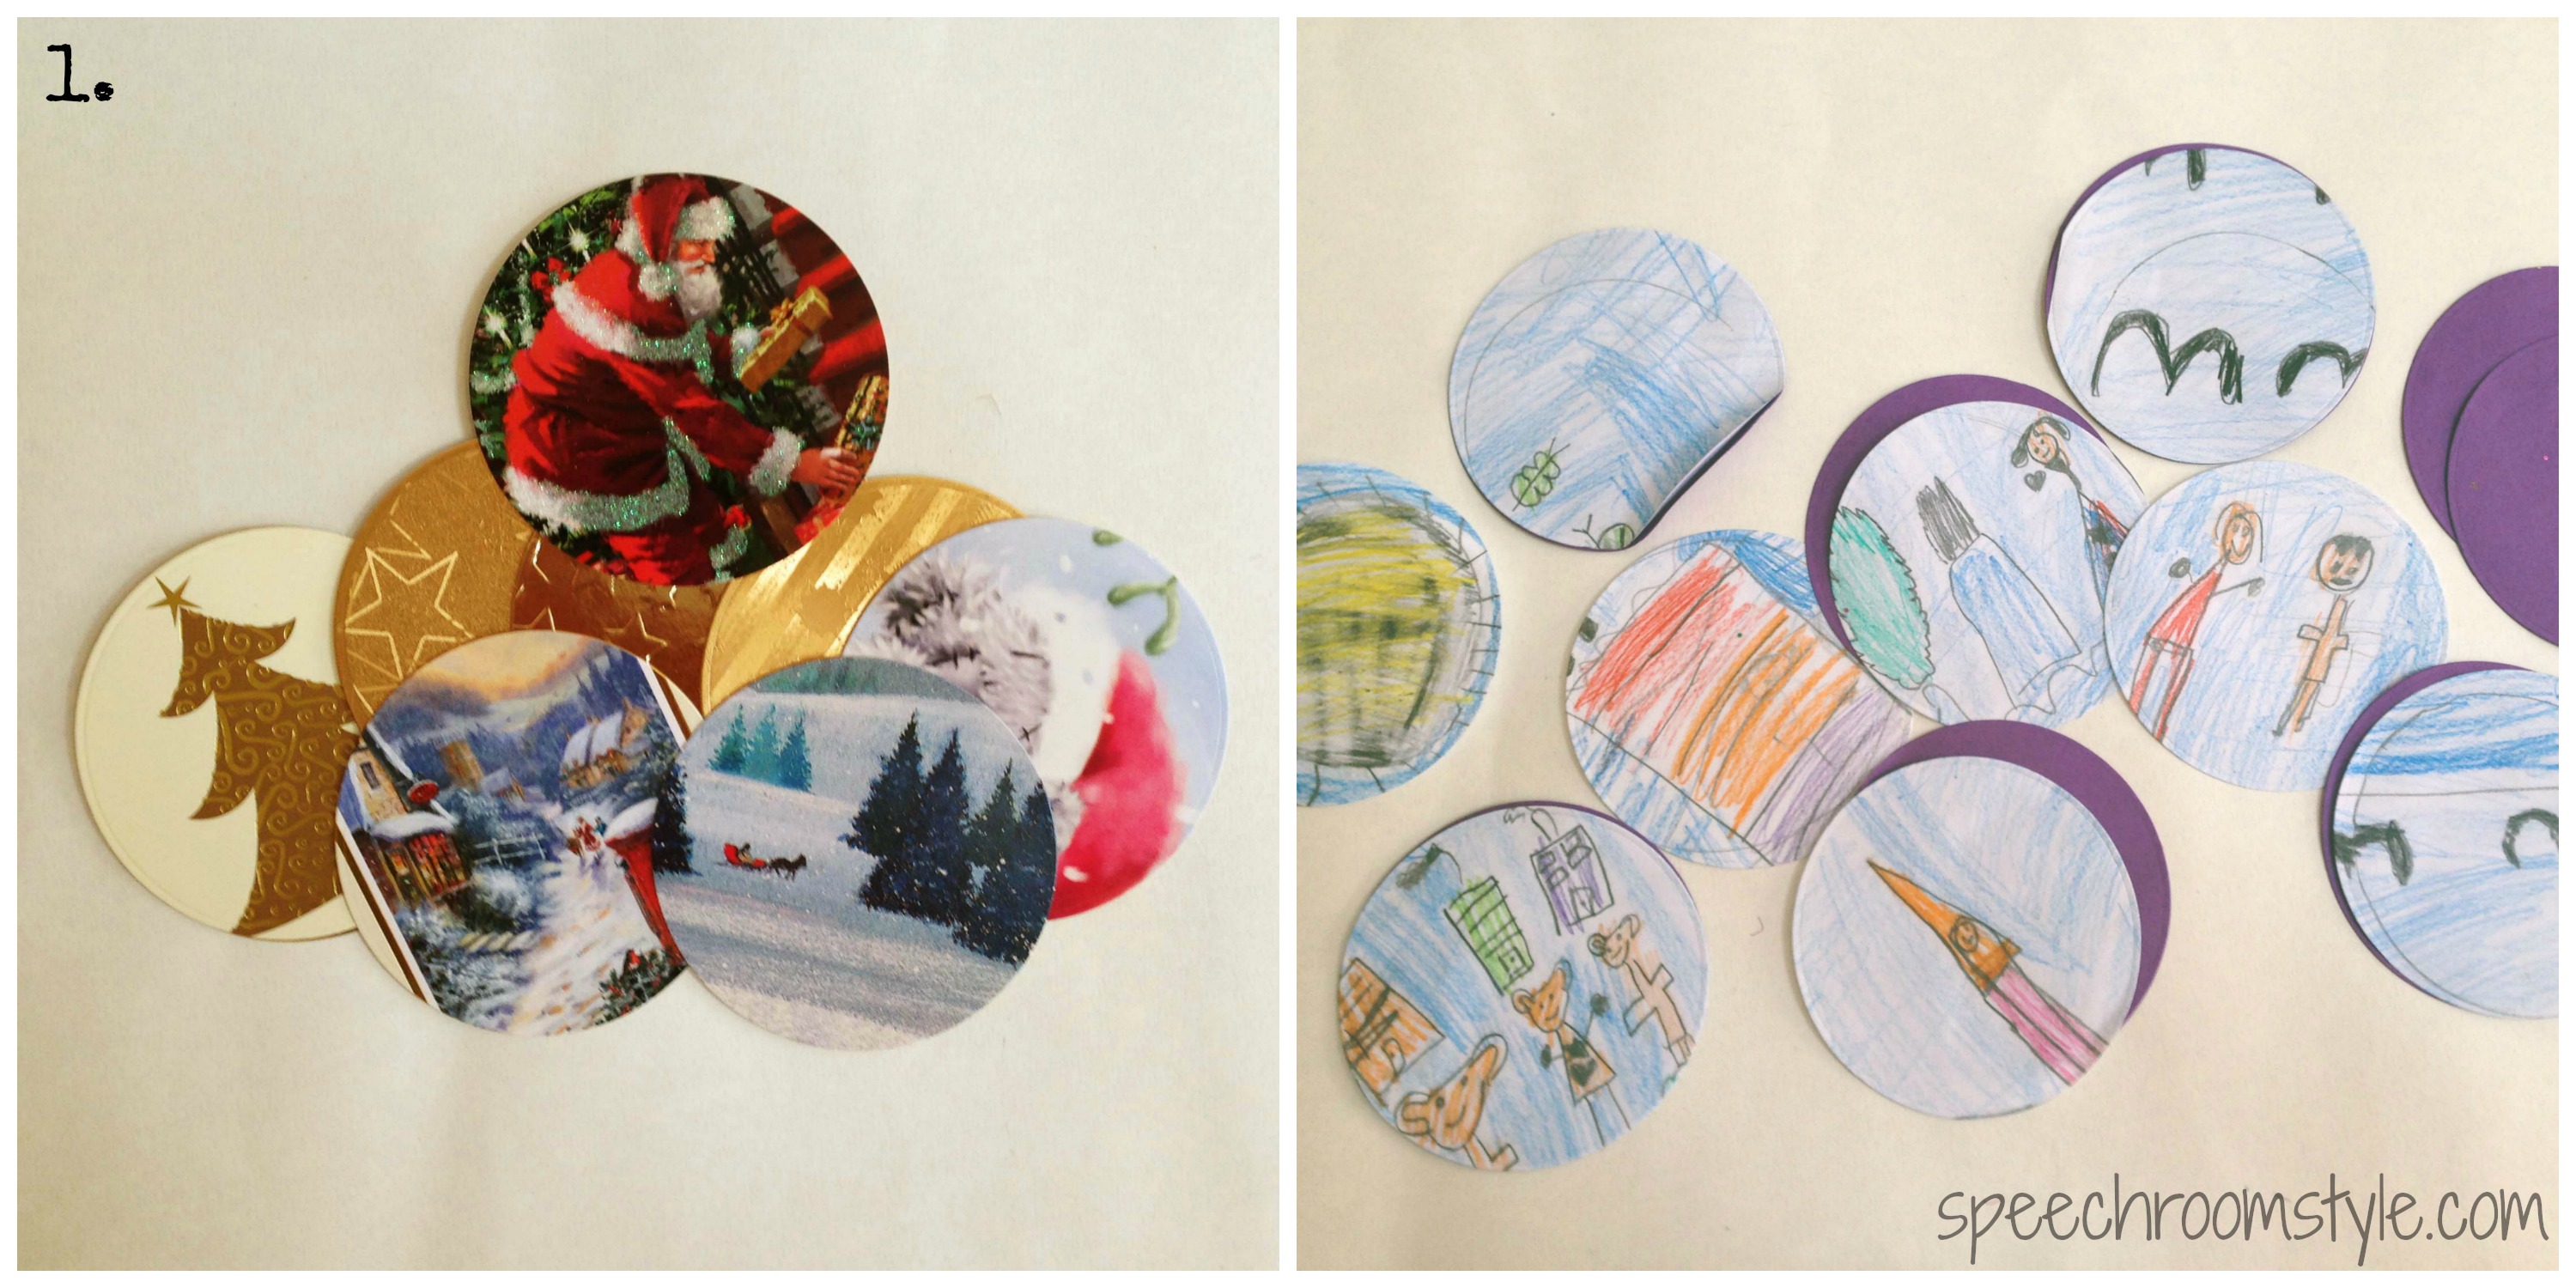
- Cut out 8-10 circles from your selected card – the ones I have used are 31/4″ circles. A die cutter will make this job so much easier and neater! For photos, you could add a frame by cutting a smaller circle out of a larger one.

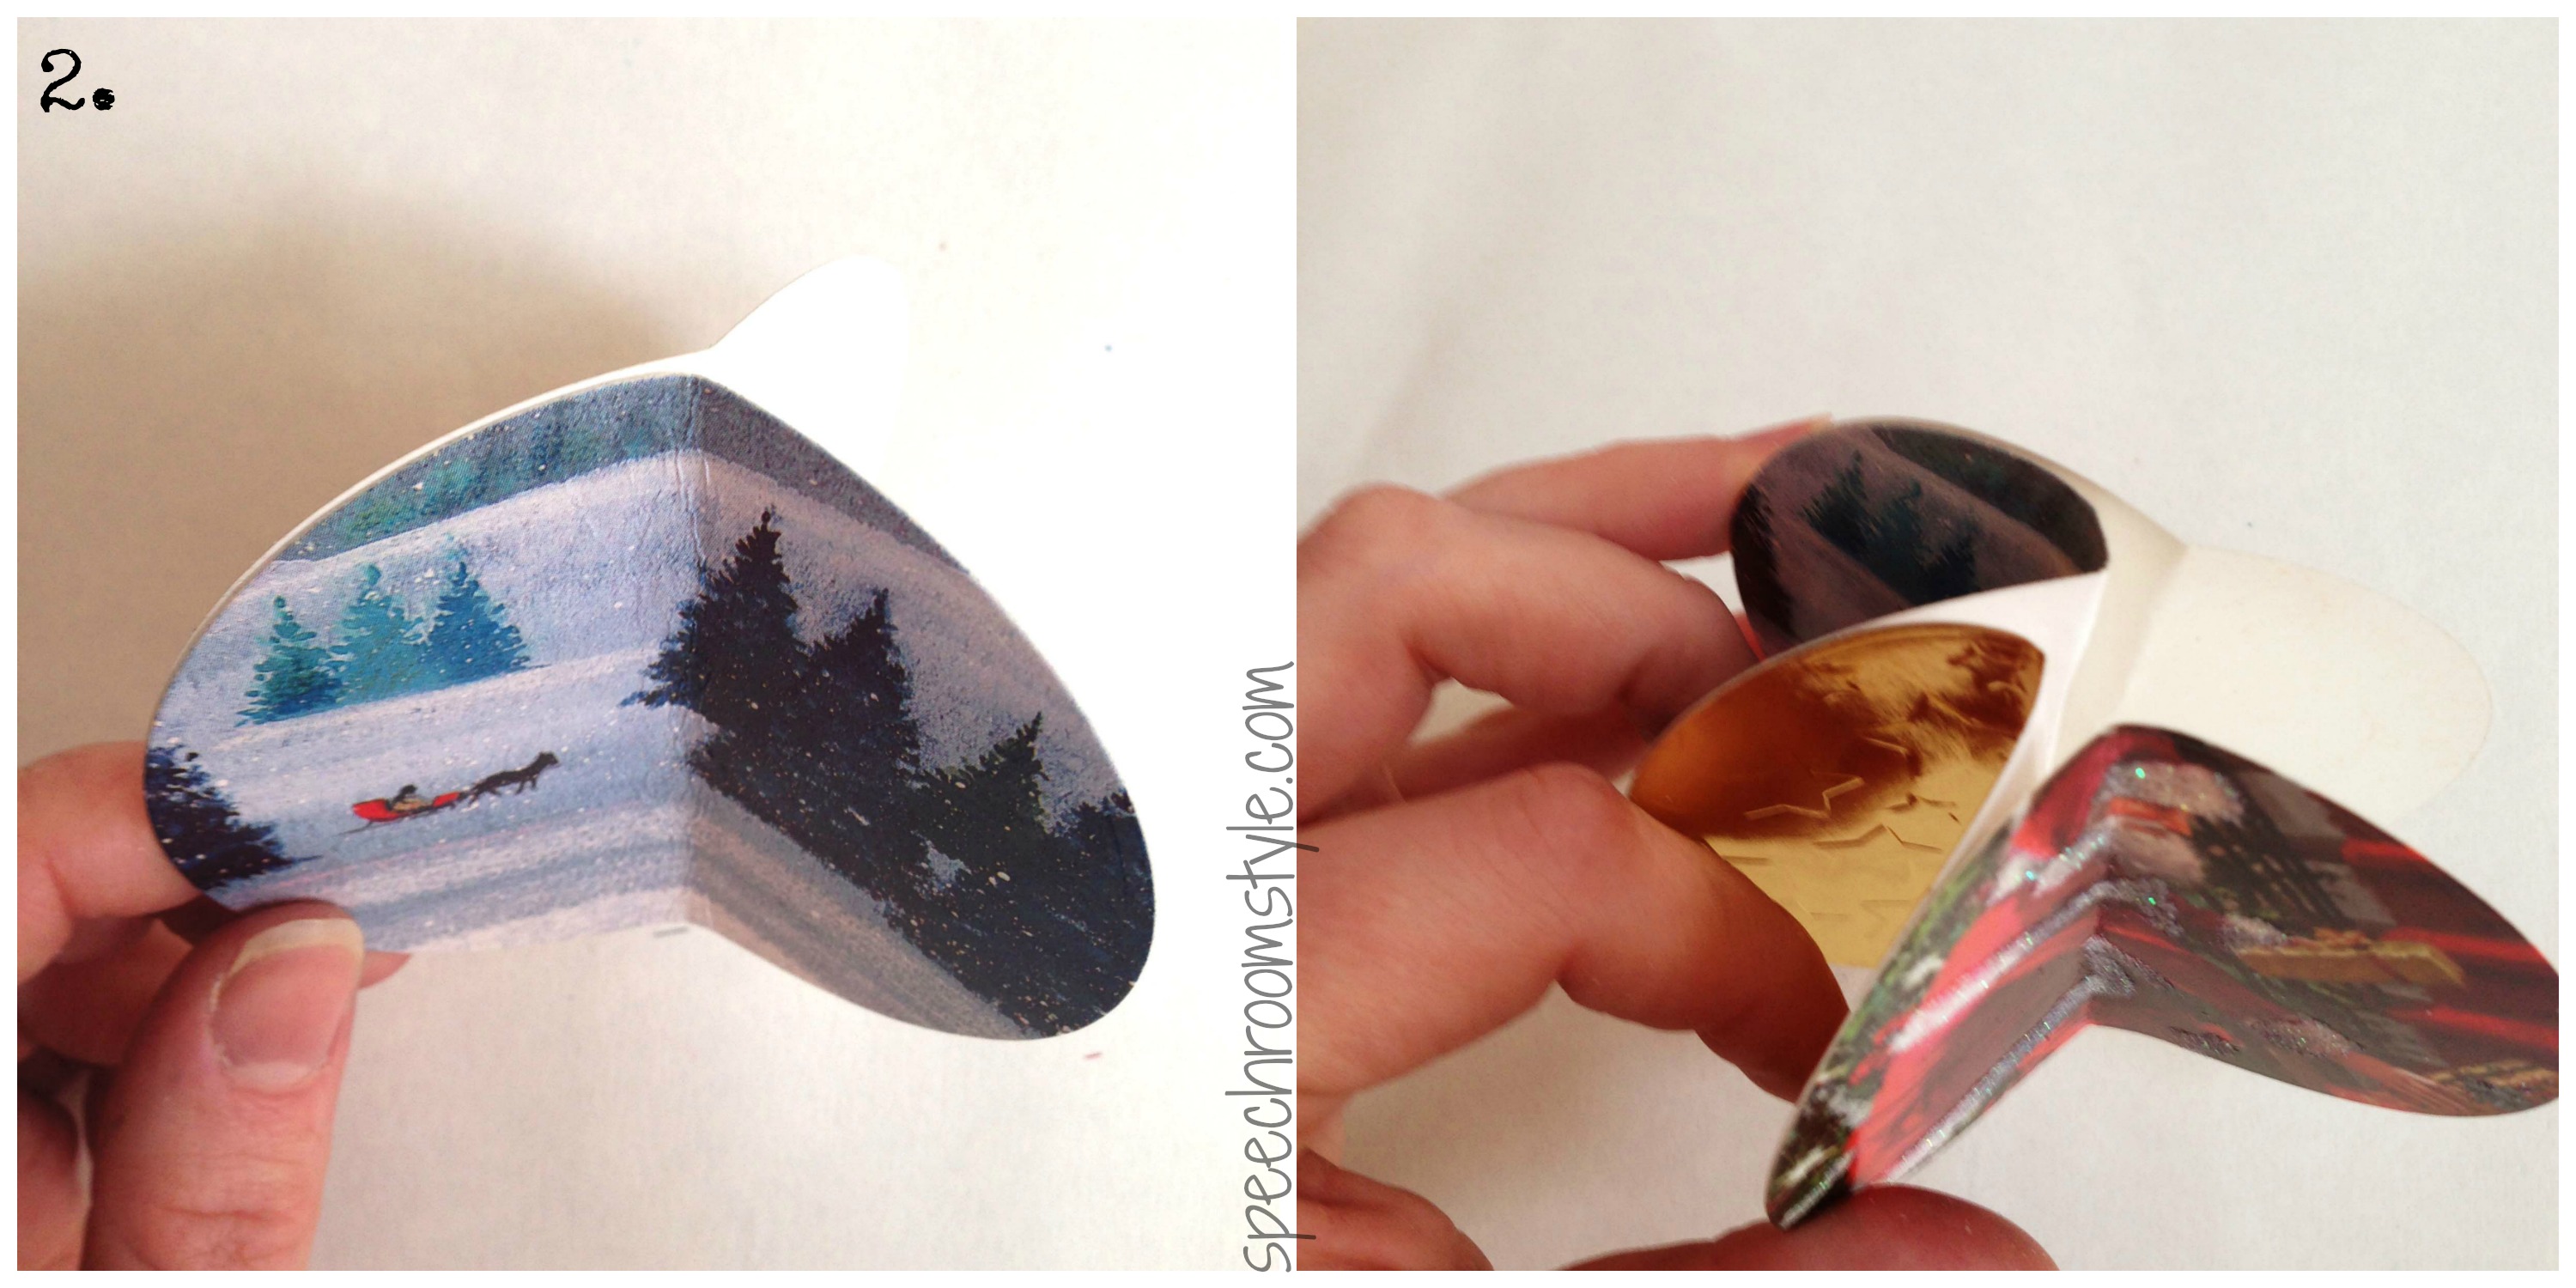
- Gently fold your circles in half (just to make a fold in them). Glue the left half of one of your circles to the right half of another…
 …continue in this way until you have glued all 8-10 pieces together. Leave to dry. (If you are using stiff card, it may be helpful to hold each spine together till fully set – I used clothespins to do this!)
 - Once dry, you will see that there is a little hollow area in the middle of your ornament – perfect to thread your ribbon/cord through.
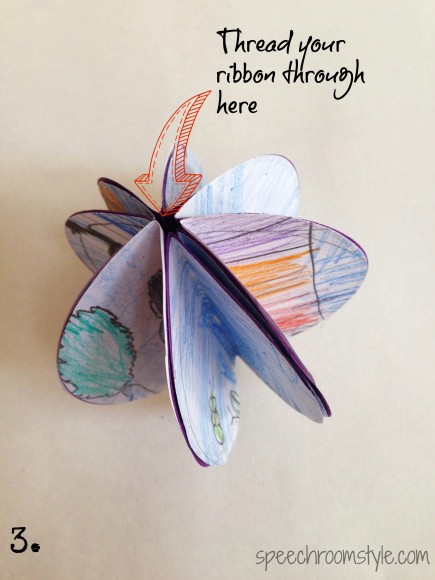 You can use a large need to guide you if necessary. Now your tree decoration is ready to hang or be boxed-up ready to be given as a gift to be treasured!

 As you can see, I have made a variety of these! I just love the photo and artwork ones – they are sure to be a much-loved tree ornament for years to come!
I hope that you have enjoyed the Christmas Tree Ornament Craft – it is so versatile that I’m sure you have a few ideas of your own to make yours that bit extra-special! Look out for more Christmas craft projects coming soon!


Leave a Comment